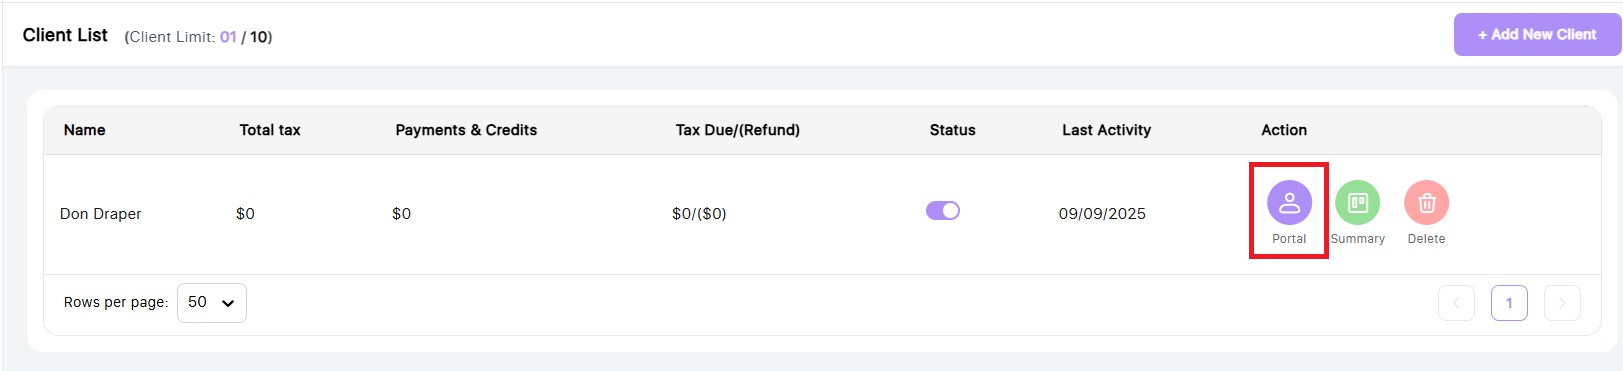
To connect QBO in Tax Planner Pro, first got to your client list and click on the purple Portal icon
Next, click on the Companies section in the left navigation bar

If you haven't set up a company yet, click to Add Company and fill out the company details. If you have a company already set up, click on the company name.
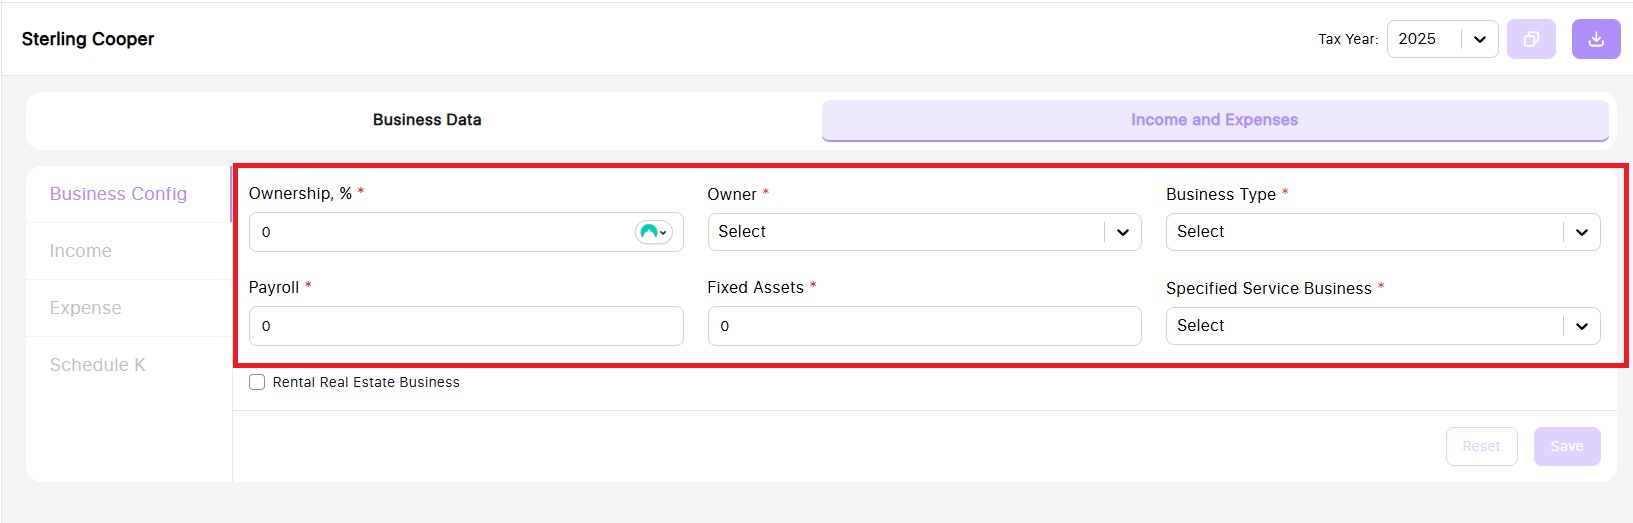
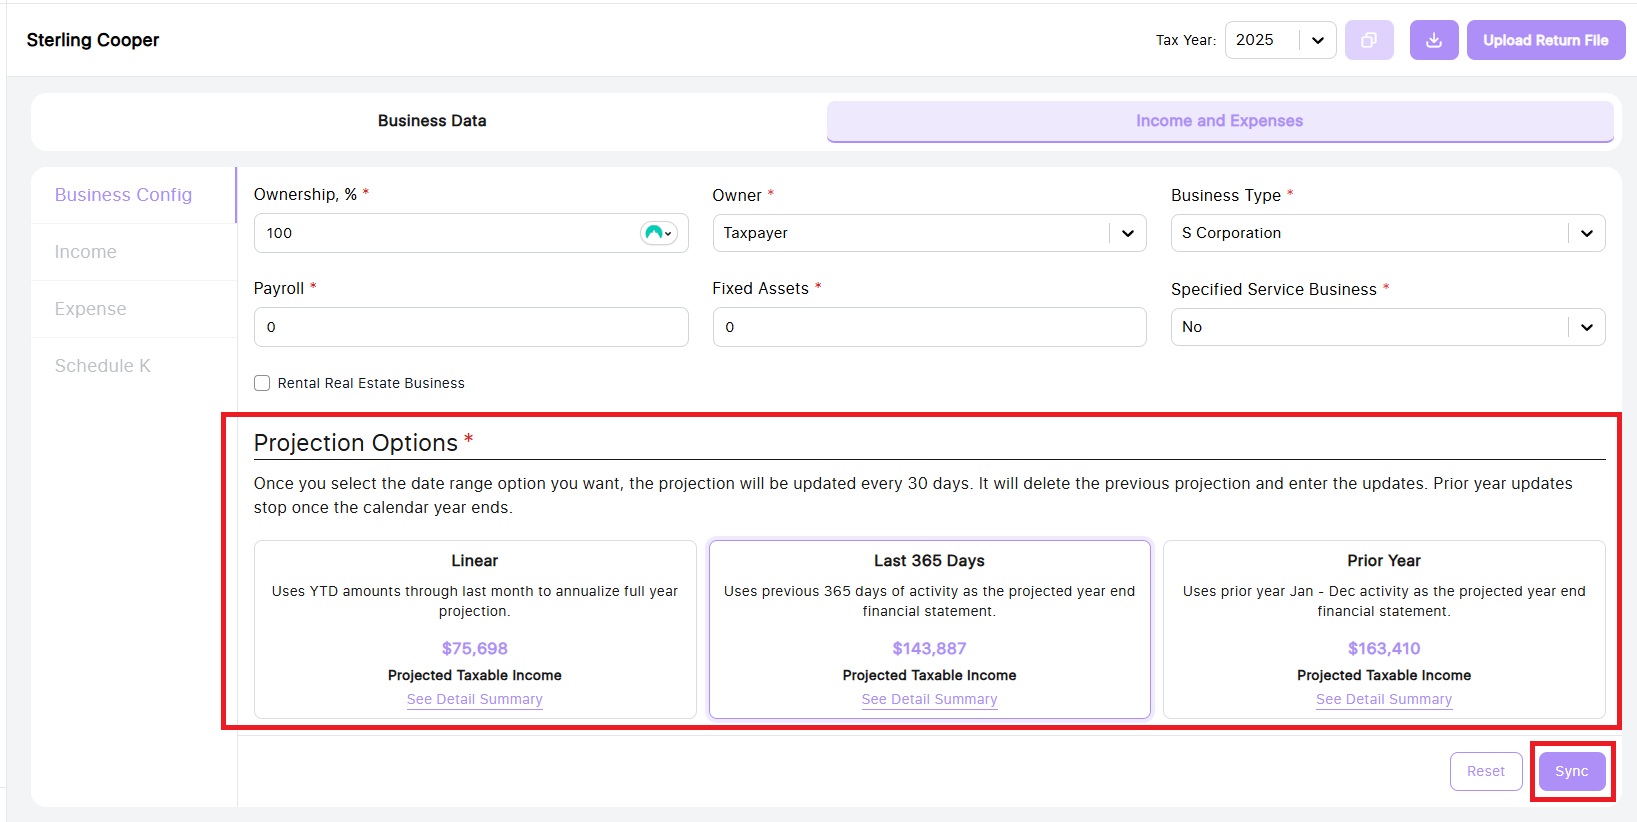
Important! You must complete the Ownership %, Owner Name, Business Type and Specified Service Business option for the QBO sync to work correctly
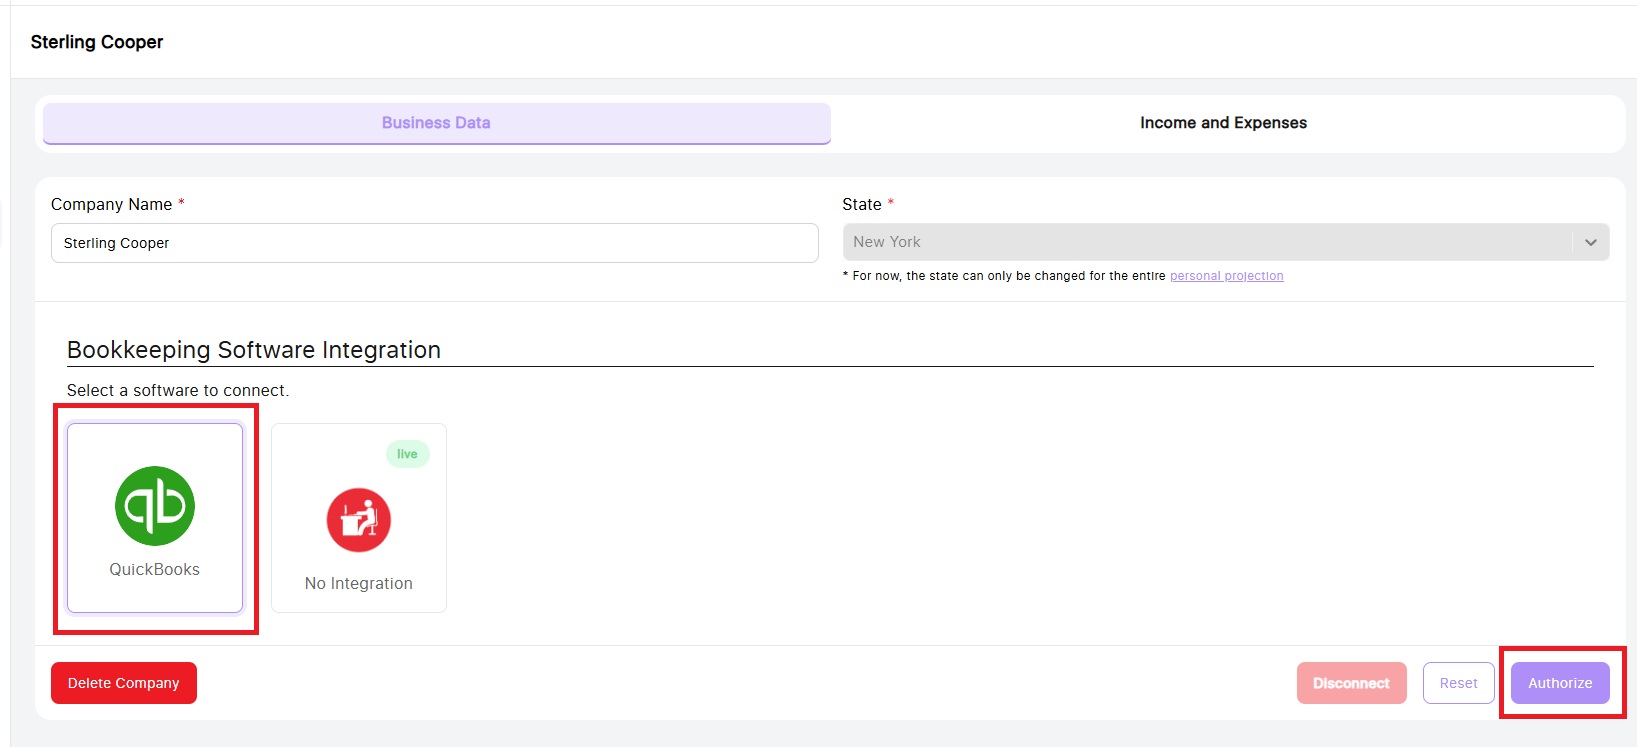
On the Business Data tab, you will see an option to connect QuickBooks. Click on the QBO icon and then click the purple Authorize button
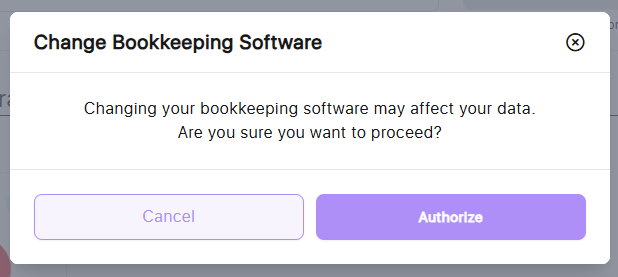
You will see a warning pop up that existing data will be overwritten with the QBO data. Click Authorize to proceed.
You will then be taken to the QuickBooks Online login page where you will enter your accountant login.
Select your company or firm and then select the client account you wish to connect. Click Next.
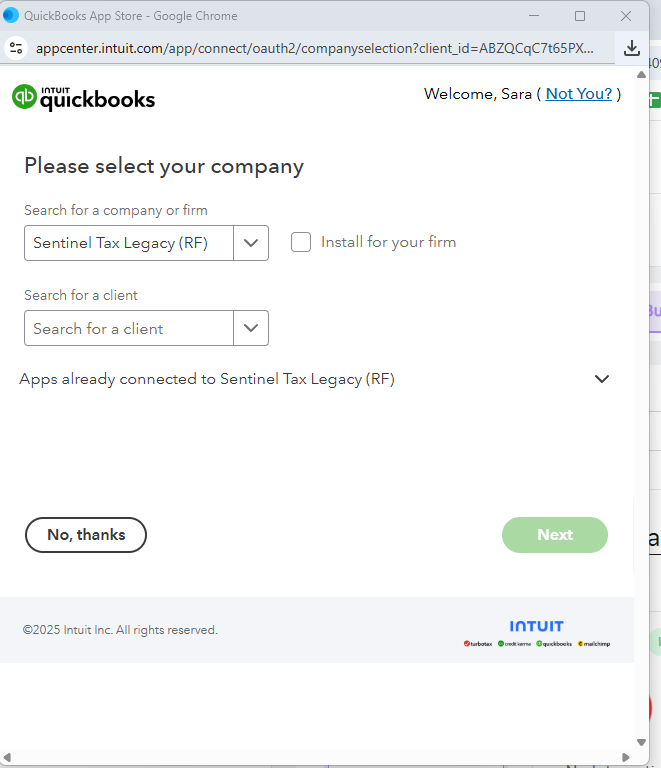
The next screen is a confirmation page that you wish to connect QBO to Tax Planner Pro. Click Connect.
Next, navigate to the Income and Expense tab. You will see 3 Projection Options. Click on the desired option and then click Sync
You will now see the data has populated in the Income and Expense pages in the left navigation bar.
You can resync the data anytime by clicking the green Resync button at the bottom of the screen
